Intro
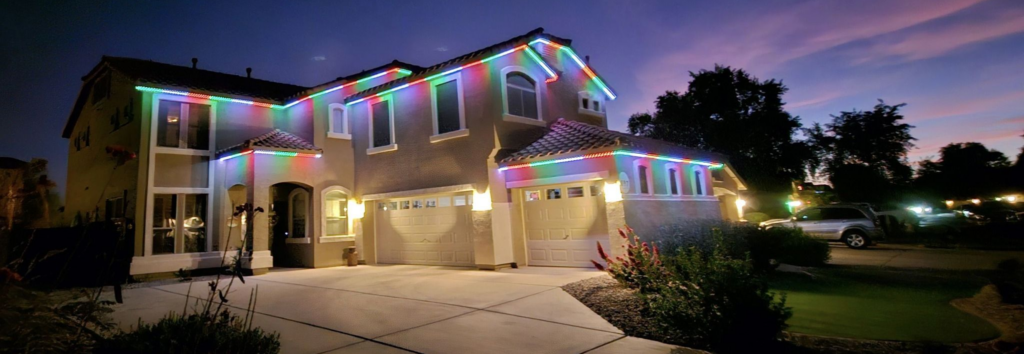
What started out as a hobby project to add animation to our Christmas lights, turned into installing forever lights on our house. As they have grown in popularity, the prices for materials has drastically reduced the overall cost, but having them professionally done was still out of my budget. I found many DIY designs on the Internet, but none of them really provided that clean low profile look like I was going for. I wanted a design that was budget friendly, would not be highly visible from the street during the day and not outlandishly obvious when walking up to the house.
Display Highlights:
- System Voltage: 24v DC
- Controller: ESP32 running WLED
- Total Lighted Length: 157ft
- Total LEDs: 625
- Build/Install Time: ~37hrs
- Parts Cost (before taxes and shipping): $697
Below, I will begin to document the process of getting them designed, built and installed on our house. Please check back often, just like all of my projects, this is a work in progress.
Tools Used
- Tape Measure
- Drill Press
- 1/8″ Drill bit
- 12mm (15/32) Drill bit
- Deburring Tool
- Needle Nose Pliers
- Wire Cutters
- Wire Strippers
- Hammer
- Paint brush or paint sprayer
- Saw Horses
- Drop Cloth
- Ladder or Lift
- Cordless Drill
- Tin Snips
About the Lights and Controller
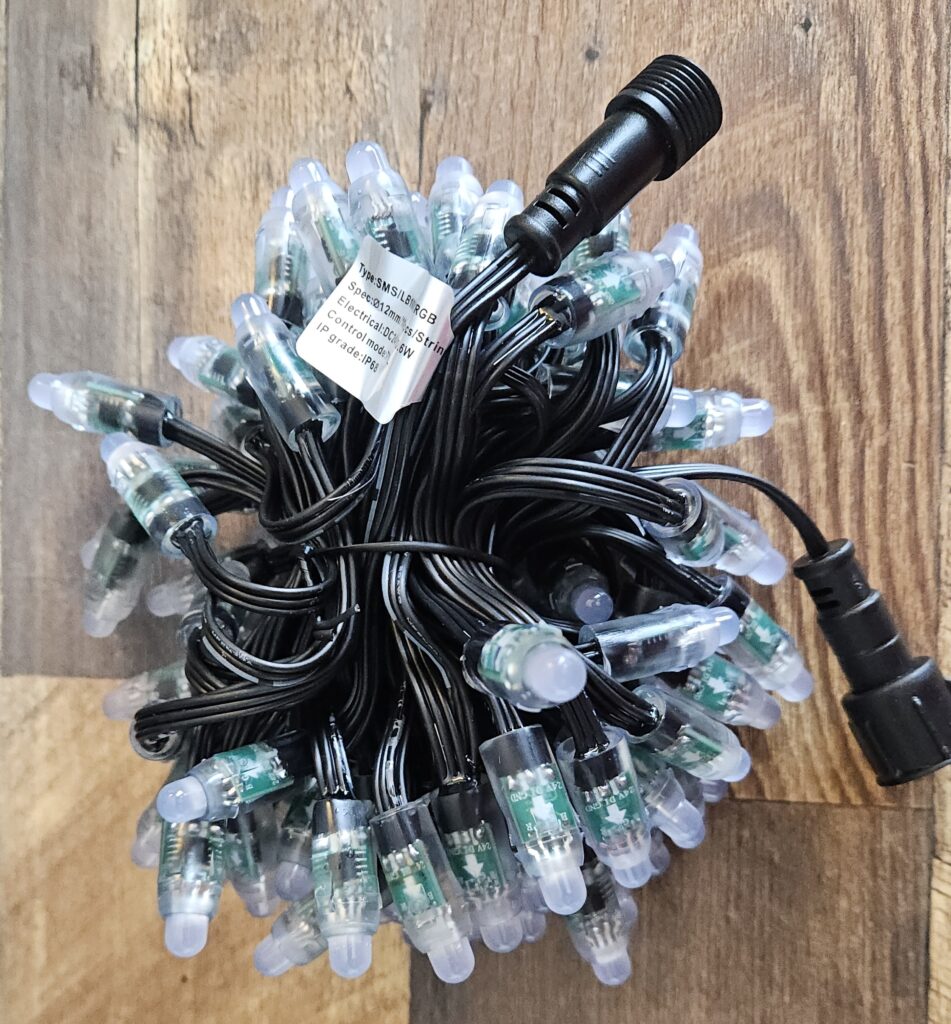
The LEDs that I have chosen are WS2811 pixels that run on 24 volts and have 100 LEDs per strand. With this voltage I’m able to run 2-3 strands without having an injection point. (More to come on this later) At the end of the 3rd strand, an injection point will be required to keep the LEDs at their full potential of brightness.
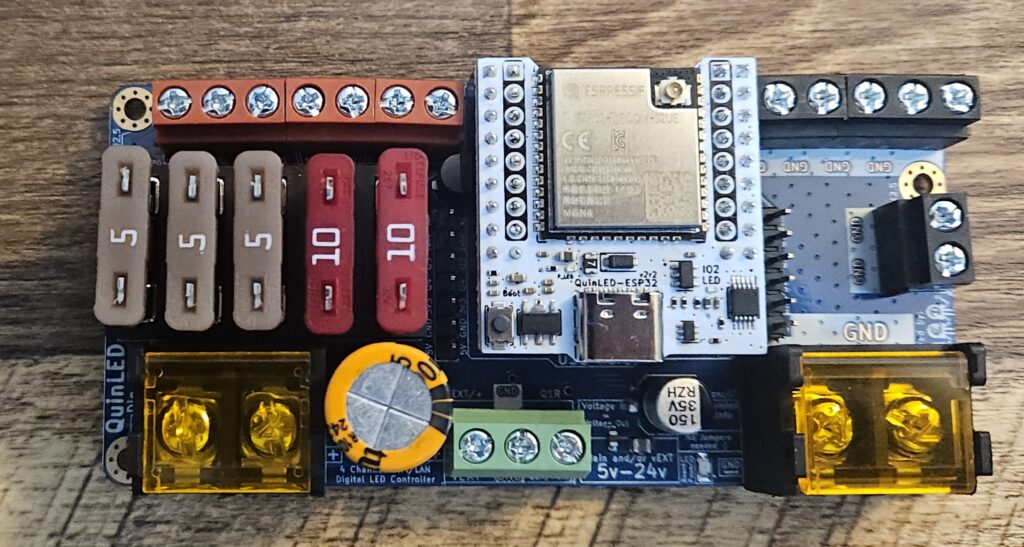
The controller that I am using is an ESP32 based controller running WLED. It supports 5v, 12v and 24v LEDs and has 4 channels of up to 800 LEDs per channel. Channel 1 is used for the upper level and front door, 442 LEDs. Channel 2 is used for the lower level on the garage, 183 LEDs. The installation on our house has 625 LEDs.
Construction of the track
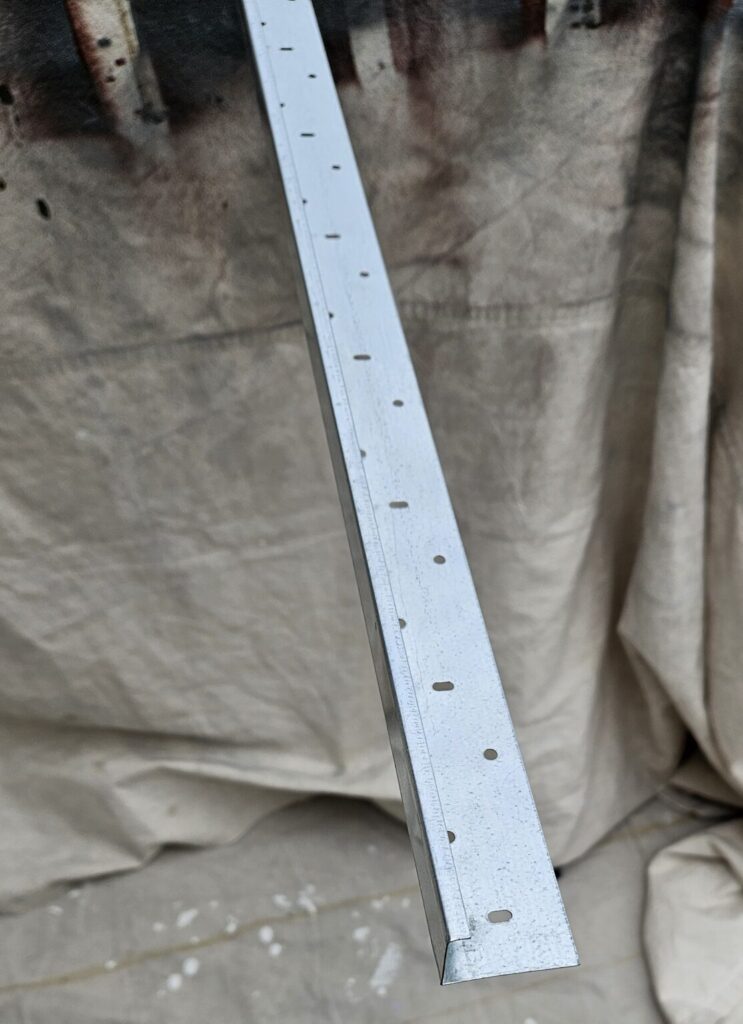
The metal channel that the LED lights are mounted into, is actually stucco end cap (referred as track from this point on) that can be found at Lowe’s. Using a drill press, the track is drilled with a pilot hole every 3″ start 1 1/2″ from the edge. To make the process go faster I made a jig (picture coming soon) that allowed me to index the channel to the next spot and not have to measure each and every hole. There are 40 holes that need to be drilled in each of the 10ft pieces of track.
NOTE: You will end up with more scrap, but you can cut the track in half to make them more manageable. Looking back now, I wish I would have done this.
Once the pilot holes are done, then the holes can be drilled to the final size of 12mm (15/32″). The bit will auto-center itself into the pilot hole, so a jig was not used for this step.
The next step is to prime the track with a primer that is designed to adhere to galvanized metal. I used one made by Rust Oleum. Once the track is primed, it can then be painted to the color that matches the house trim. Brushing works, but is very time consuming and messy. I ended up purchasing an air paint sprayer from Harbor Freight for $15, and thinned the latex paint until it gave me the coating that I wanted.
Mounting the track
Note: These next steps assume that you have eaves that are open and have a wood facia.
The next step is to mount the track on the inside of the eaves. If mounting lights on a single story house, I would mount all of the track and the go back and then install the LEDs. On a two story house you will want to install the LEDs as you go.
Depending on the number of LEDs and the design of the house I would start in the center of the area that you are illuminating. This will allow you to have shorter runs, less controllers and potentially less injection points.
- For eaves where the facial is straight up and down, align the track to the bottom edge and secure.
- For eaves that have a slant to them, you will want to lower the track to match the lowest edge of the eave and add wedges behind the track to make it flat. This may take several attempts to get them adjusted properly.
Using 1″ coated drywall screws to mount the track, screw through the holes in the track into the back side of the facia.
Once the track is mounted, I laid in the feeder cable to carry power, that will later to be used for an injection point.
Next step is to start pushing the LEDs into the holes. The LEDs will fit very tightly into the hole and may require a fair amount of force to get them fully seated.
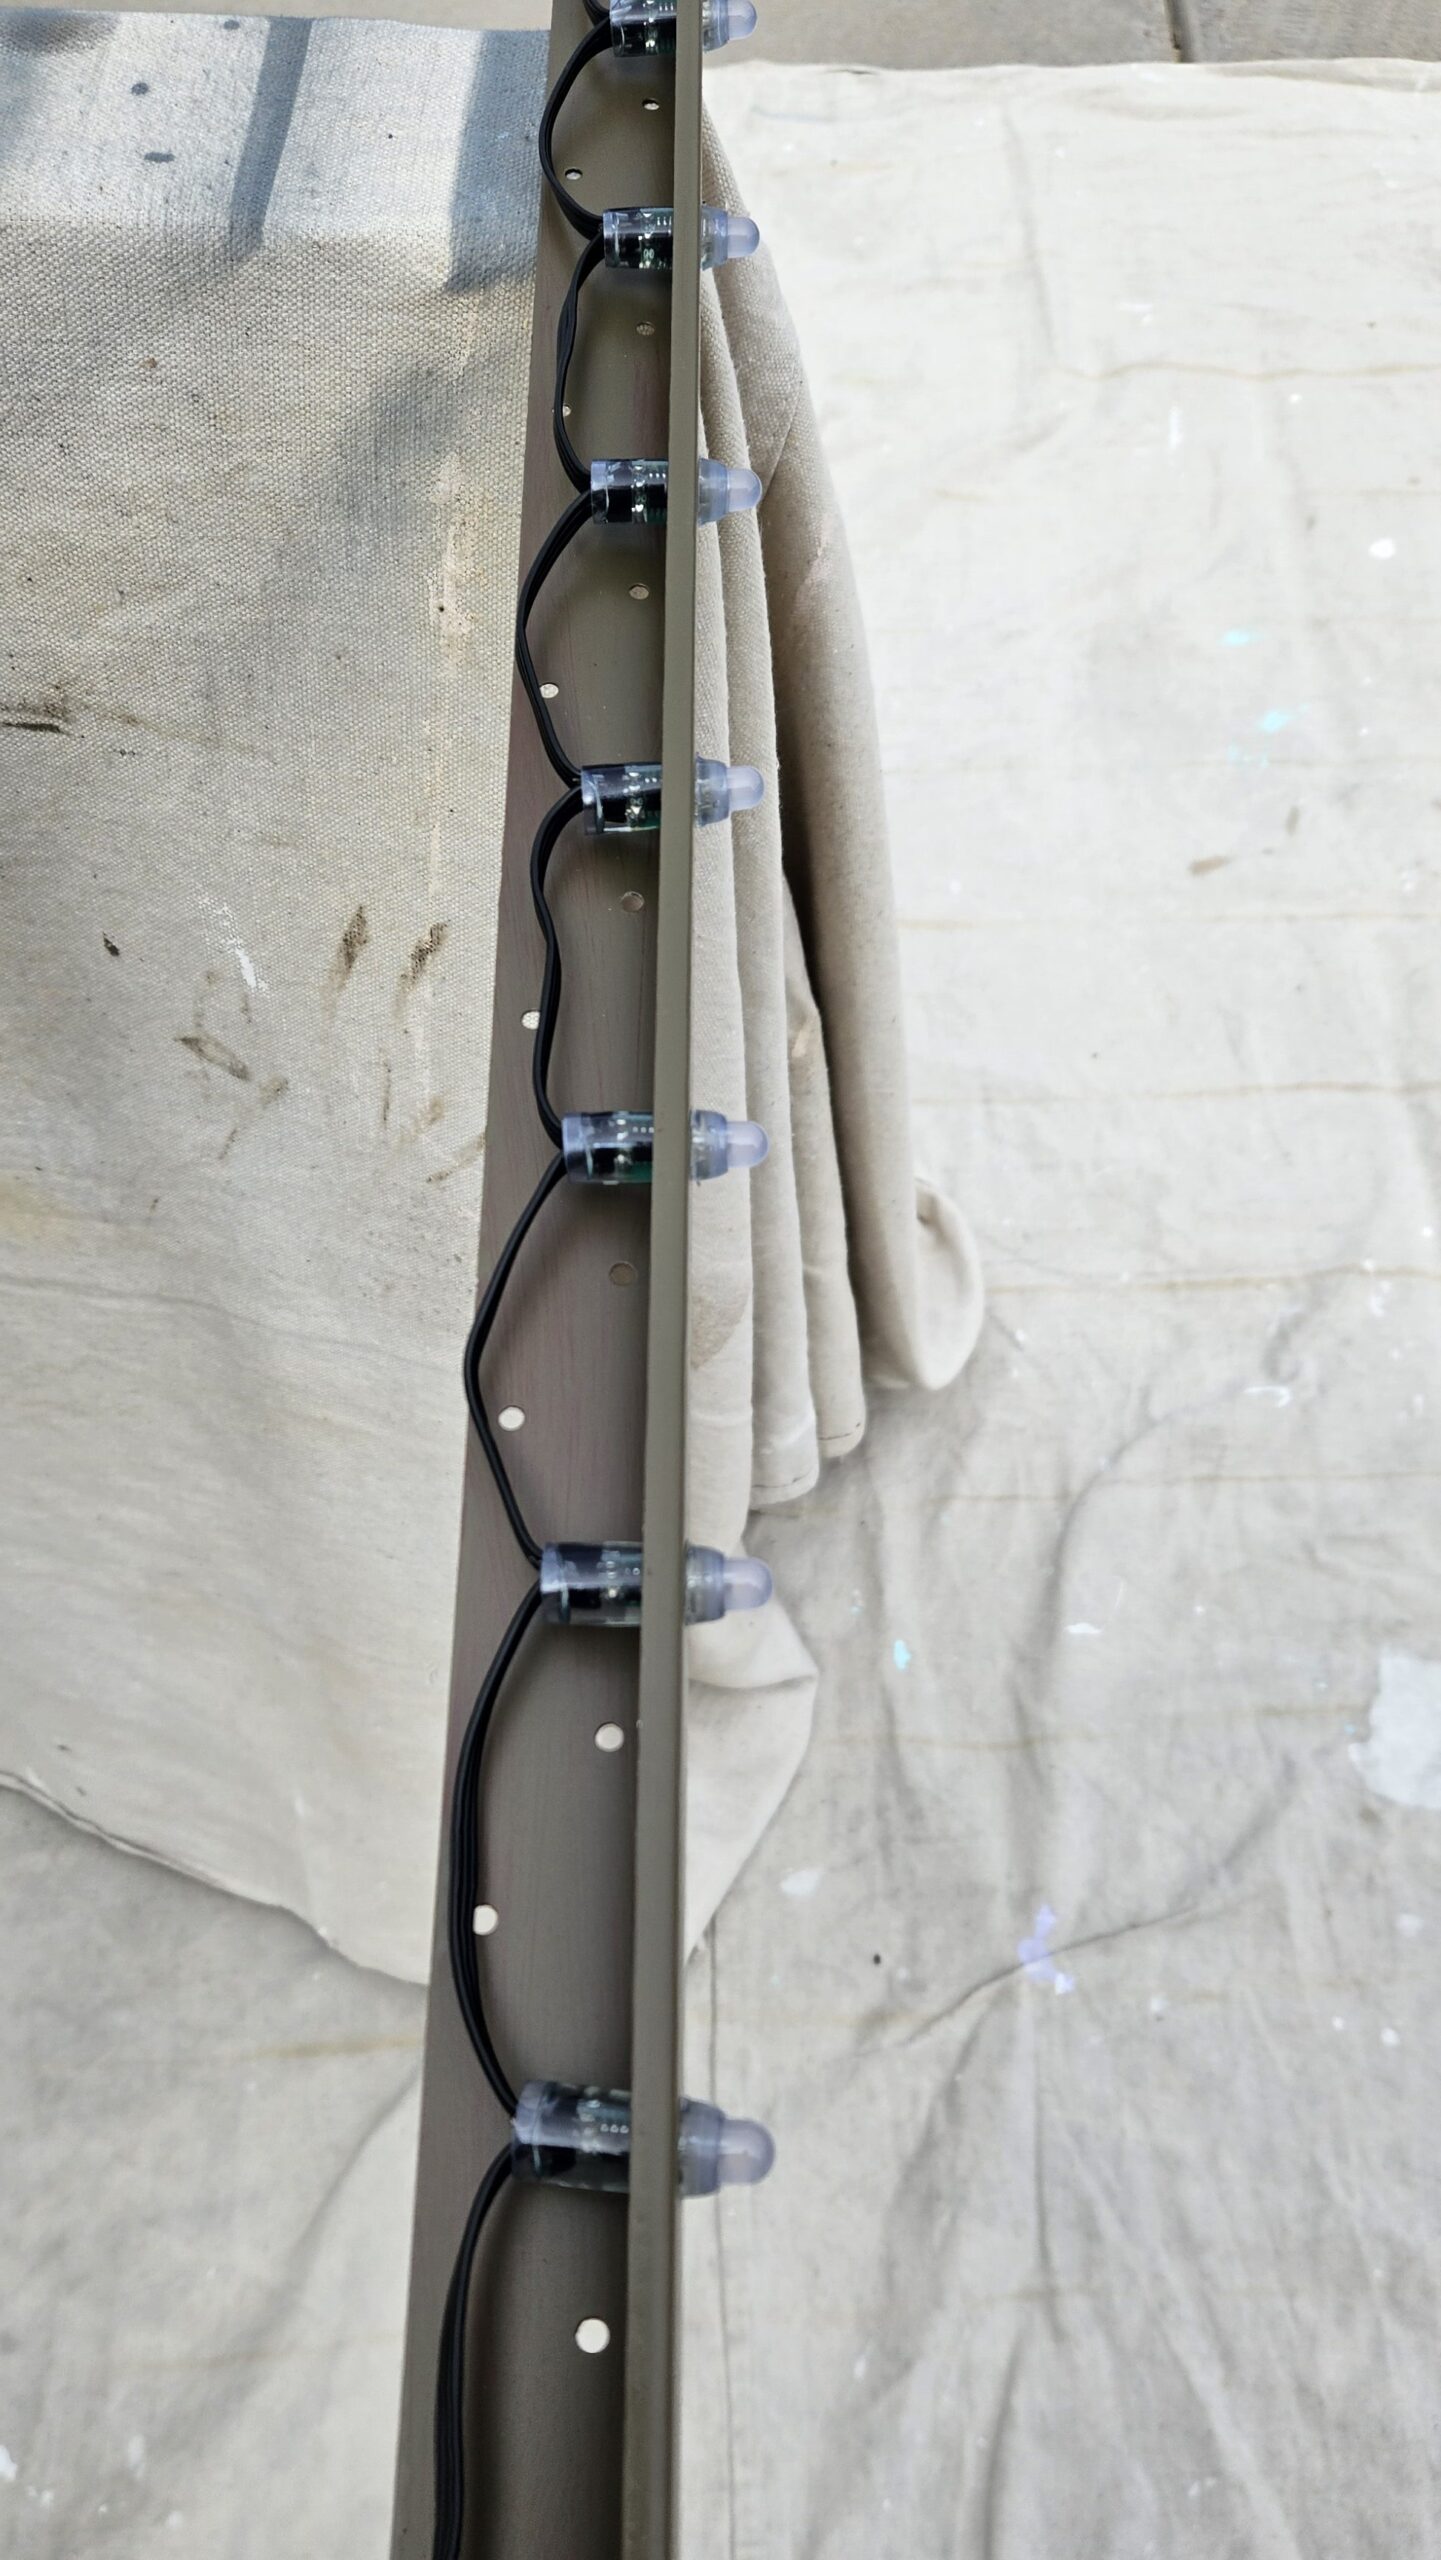
NOTE: Here is a picture of the LEDs mounted in the track prior to hanging. I tried both preloading the LEDs and loading them after the tracks were hung. Having them preloaded made it easier to get them inserted and not so hard on the fingers, but made it harder to manage due to the added weight and the excess cable hanging at the end.
Once Completed it will create a look something like this.
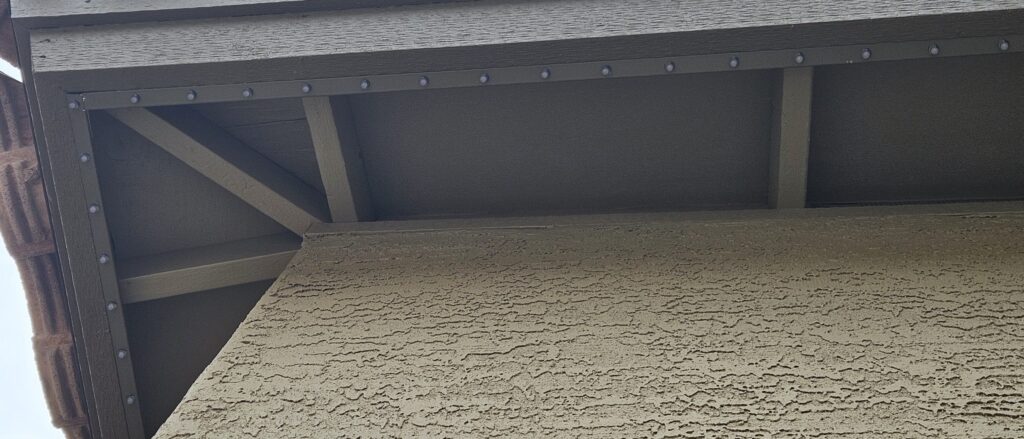
Wiring
Coming Soon…
I start out with the controller and LEDs being powered by a single 24v power supply in the garage. I ran a single channel to trim out the garage with a second channel going to the upper level of the house. I ran 16AWG cable for the power injections at the 300 LED point and again near the end of the string.
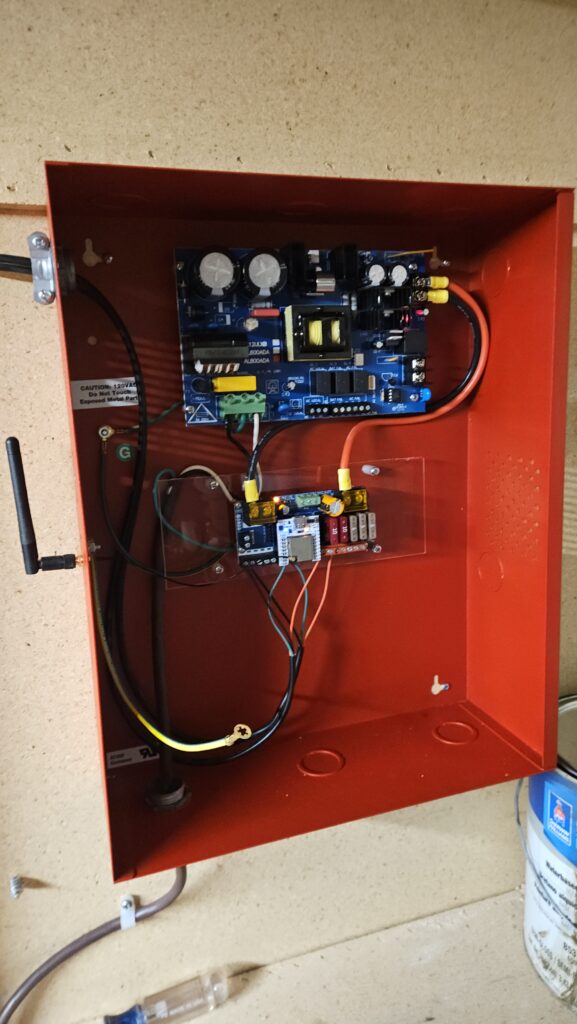
For this project I was able to use a salvaged fire alarm case w/ 24v @8amp power supply to house the controller. At first look, there is a lot of wasted space, but this will give me room for expansion in the future.
From the controller there are 2 3-wire 16 guage cables running out to the eaves. These cables provide the power and the data connection to LEDs.
Parts list
| Item Description | Item Number | Place purchased | Qty |
|---|---|---|---|
| 7/8-10 short flange CaseBD – Stucco | 233706 | Lowes | 16 |
| 100ft. 16AWG – 3 Strand (Used to link sections together) | Amazon | 1 | |
| 200ft. 16AWG – 2 Strand (Used for Power Injection) | Amazon | 1 | |
| 10AWG Silicon Stranded wire | Amazon | 1 | |
| Alitove 24V 15A 360W Power Supply | Amazon | 1 | |
| Rust Oleum Galvanized Bright Gray | Home Depot | 2 | |
| Black Pigtail xConnect/Holiday (10 Pair) | Amazon | 1 | |
| Coated Drywall Screws – 1-1/4″ | Home Depot | 1 | |
| Wago connector-2 prong | Amazon | 1 | |
| Wago connector-3 prong | Amazon | 1 | |
| Heat shrink | Amazon | 1 | |
| Alitove 24v ws2811 RGD led Pixels (100) | Amazon | 7 | |
| Dig Quad ESP32 based controller | Dr ZZ’s | 1 |